
In this article, I describe how to connect a capacitive soil moisture sensor to the ESP8266 NodeMCU microcontroller and set up notifications via a Telegram bot in case of a decrease in moisture levels.
Table of Contents
The Idea
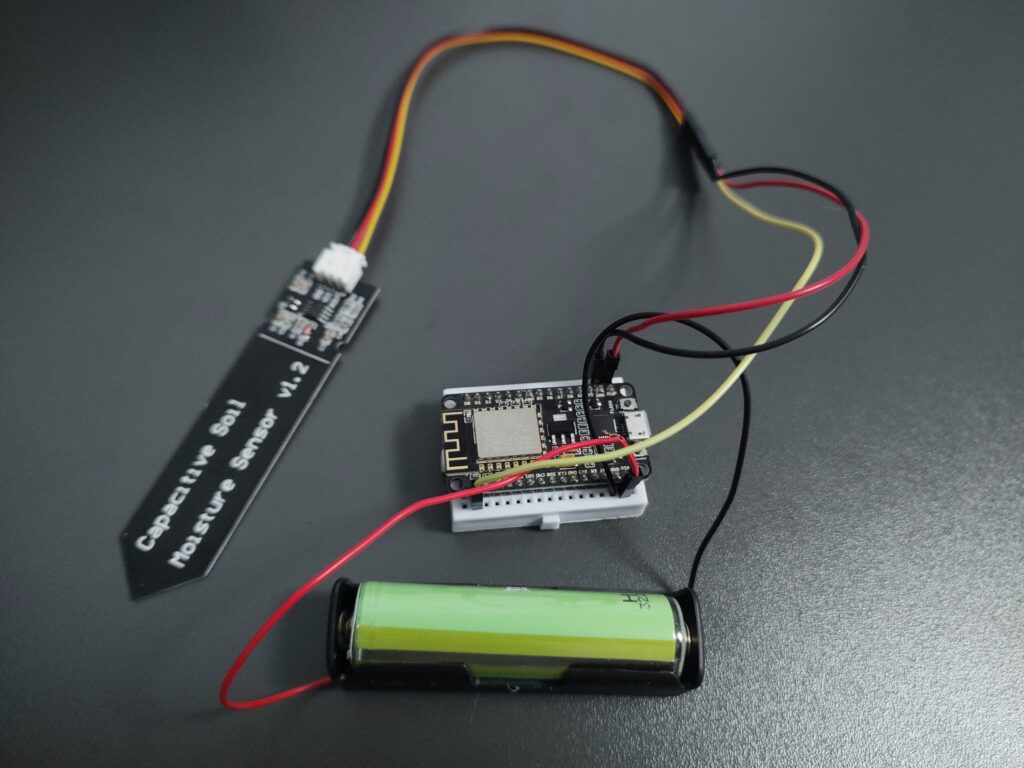
The idea is to develop an autonomous IoT device that will have access to the internet and can monitor the soil moisture sensor readings of a houseplant. If necessary, it will send me a message on Telegram, reminding me to water the plant. My implementation is a compilation of several projects, links to which can be found at the end of the publication.
Components for the project
ESP8266 NodeMCU
The ESP8266 NodeMCU is a popular platform for developing Internet of Things (IoT) projects based on the ESP8266 microcontroller. It is designed for connecting devices to Wi-Fi networks and the internet. The main advantages of this platform are:
- Built-in Wi-Fi: The presence of built-in Wi-Fi allows easy connection of devices to networks and remote control via the internet.
- Compact Size: The small size of the NodeMCU board makes it suitable for use in small devices and embedded systems.
- Arduino IDE Support: The platform supports the Arduino IDE, making software development convenient and accessible.
- Low Cost: The ESP8266 NodeMCU is a budget-friendly option for creating IoT projects, making it accessible to a wide range of developers.
- Wide Range of Features: The platform has a large number of digital and analog inputs/outputs, allowing for the connection of various sensors, displaying information on screens, and controlling actuators.
The ESP8266 NodeMCU is a popular tool for developing various IoT projects due to its functional capabilities, ease of use, and availability.
Capacitive Soil Moisture Sensor v1.2
The Capacitive Soil Moisture Sensor v1.2 is an electronic sensor designed for measuring soil moisture using the capacitive method. It is widely used in agriculture, gardening, greenhouse conditions, and other applications where controlling the soil moisture level is important for optimal plant growth.
Key features of the Capacitive Soil Moisture Sensor v1.2:
- Working Principle: The soil moisture sensor uses the principle of changing the capacitance of a capacitor formed between two metal plates. The more moisture in the soil, the higher the capacitance of the capacitor.
- Analog Output: The sensor has an analog output that can be connected to a microcontroller such as Arduino or ESP8266 NodeMCU for reading moisture values and further data processing.
- Low Power Consumption: The sensor uses a small amount of energy, allowing it to work for a long time on battery power.
- Easy Installation: It can be easily installed in soil or a plant container, and it will start sending moisture data.
- Calibration: The sensor can be calibrated for specific types of soil, allowing for more accurate measurement results.
- Reliability: The Capacitive Soil Moisture Sensor v1.2 is known for its reliability and stability in operation.
This sensor is a useful tool for those involved in plant cultivation who want to ensure optimal moisture for healthy growth. Due to its ease of use and reliability of measurements, it finds wide application in agriculture and gardening.
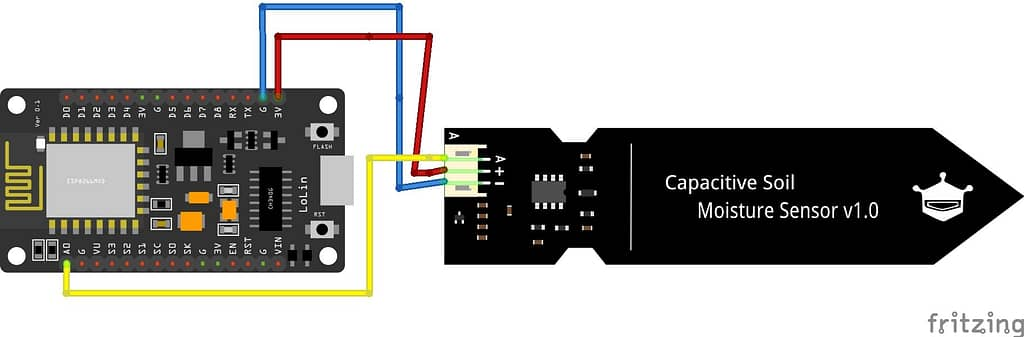
Connecting the capacitive soil moisture sensor
The connection diagram of the soil moisture sensor to the microcontroller is simple and provided below.
Software
Creating a Telegram Bot
To begin, we need to create a chatbot and obtain its token. I described how to do this in a publication about Raspberry Pi, and you can find details here. Then, we will insert the token into the program code for the parameter BOTtoken.
We also need the identifier of our user in Telegram. To do this, search for the “IDBot” application in Telegram, then in the chat, type /start and /getid.
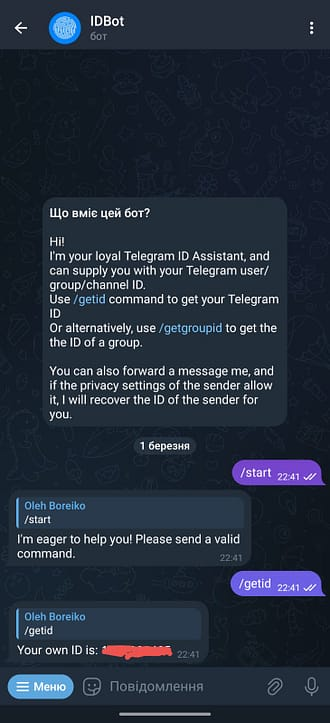
We substitute this identifier in the CHAT_ID parameter in the program code.
Required Libraries
I used the Universal Telegram Bot Library created by Brian Lough. The library provides a simple interface to the Telegram Bot API. After downloading the library, I imported it into the Arduino IDE using Sketch > Include Library > Add.ZIP Library… We also need ArduinoJson. You can install it in the Arduino IDE: Sketch > Include Library > Manage Libraries, search for “ArduinoJson,” and install the library.
Code
/*
* This ESP8266 NodeMCU code was developed by newbiely.com
*
* This ESP8266 NodeMCU code is made available for public use without any restriction
*
* For comprehensive instructions and wiring diagrams, please visit:
* https://newbiely.com/tutorials/esp8266/esp8266-soil-moisture-sensor
*/
#include <ESP8266WiFi.h>
#include <WiFiClientSecure.h>
#include <UniversalTelegramBot.h>
#include <ArduinoJson.h>
#define AOUT_PIN A0 // The ESP8266 pin ADC0 that connects to AOUT pin of moisture sensor
#define THRESHOLD 530 // CHANGE YOUR THRESHOLD HERE
// Replace with your network credentials
const char* ssid = "REPLACE_WITH_YOUR_SSID";
const char* password = "REPLACE_WITH_YOUR_PASSWORD";
// Initialize Telegram BOT
#define BOTtoken "XXXXXXXXXX:XXXXXXXXXXXXXXXXXXXXXXXXXXXXXXXXXXX" // your Bot Token (Get from Botfather)
// Use @myidbot to find out the chat ID of an individual or a group
// Also note that you need to click "start" on a bot before it can
// message you
#define CHAT_ID "XXXXXXXXXX"
X509List cert(TELEGRAM_CERTIFICATE_ROOT);
WiFiClientSecure client;
UniversalTelegramBot bot(BOTtoken, client);
void setup() {
Serial.begin(115200);
configTime(0, 0, "pool.ntp.org"); // get UTC time via NTP
client.setTrustAnchors(&cert); // Add root certificate for api.telegram.org
// Attempt to connect to Wifi network:
Serial.print("Connecting Wifi: ");
Serial.println(ssid);
WiFi.mode(WIFI_STA);
WiFi.begin(ssid, password);
while (WiFi.status() != WL_CONNECTED) {
Serial.print(".");
delay(500);
}
Serial.println("");
Serial.println("WiFi connected");
Serial.print("IP address: ");
Serial.println(WiFi.localIP());
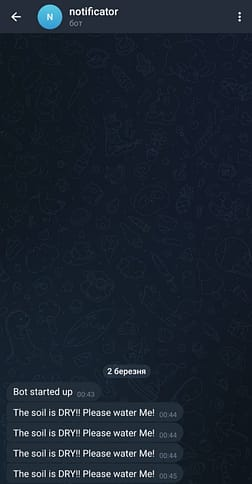
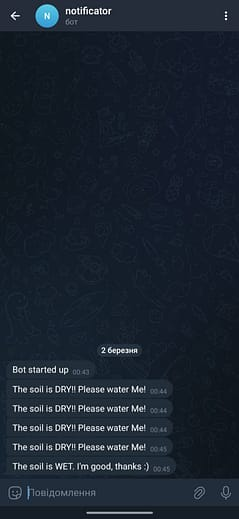
bot.sendMessage(CHAT_ID, "Bot started up", "");
}
void loop() {
int value = analogRead(AOUT_PIN); // read the analog value from sensor
if (value > THRESHOLD) {
Serial.print("The soil is DRY (");
bot.sendMessage(CHAT_ID, "The soil is DRY!! Please water Me!", "");
}
else {
Serial.print("The soil is WET (");
bot.sendMessage(CHAT_ID, "The soil is WET. I'm good, thanks :)", "");
}
Serial.print(value);
Serial.println(")");
delay(20000);
}The Result

The next step could be automatic plant watering, but that’s a topic for a new article 🙂